About a year ago, I got my friend Ryan an Arduino for his birthday. We futzed around with it for a while trying to come up with a good project, and in the end we decided to try to read an SD card.
We didn’t really have a reason for it, it just seemed like an achievable goal for a first Arduino project. I seem to recall that we wanted to understand SPI, and Ryan wanted to implement SPI in software. After about a month of weekly meetings, we were still trying to figure out the SD card SPI standard. We’d made some progress with the initialization routine for the card, but the CRC functions had us completely stumped.
In the end, my friend moved to NYC and I completely forgot about the project.
Fast forward to a month ago and I’m looking into ways to get my Arduino to play some sound files for a robotics project. When I stumbled on the Adafruit Waveshield, I also found an answer to my SD card questions. The Waveshield comes with a library to read SD cards. It didn’t take me long to get it working with the hardware I had on hand.
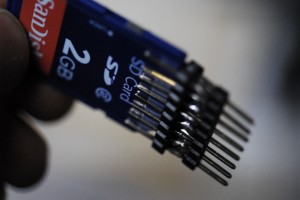
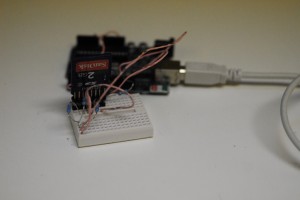
I wrote up a quick script to read and display the contents of a file, then hooked up my SD card. I didn’t have an SD slot handy, so I soldered some headers together into a nice holder. It may be hard to tell from the picture, but I used three sets of headers. One on the bottom sandwiched by two on the top. The top two also clamp onto the SD card.
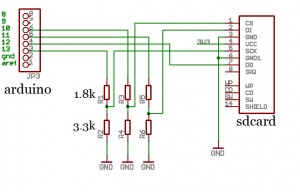
This allowed me to connect the SD card as shown in this schematic. The resistors are there to act as voltage dividers. The SD card needs 3.3 V signaling, but the Arduino provides 5 V signaling. In the Adafruit Waveshield, they use buffers to do the level conversion. Voltage dividers are quick and dirty, but probably not the best solution.
The sketch I wrote required me to add the Adafruit library to my library folder, as shown here.
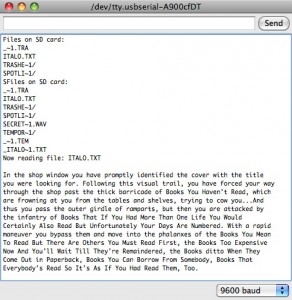
Once I had everything hooked up, it worked great. The only problem I ran into while putting this together was the formatting of the SD card. The SD library expects FAT16 formatting, which means that the naming conventions for files are pretty strict. Filenames have to be at most eight characters before the “.”, and file extensions can only be three characters.
I think I might put together a little R-2R DAC and make myself a quick and dirty music player.
Code for this is as follows:
#include <FatReader.h>

SdReader card;
FatVolume vol;
FatReader root;
FatReader file;

void setup() {
  Serial.begin(9600);
  if (!card.init()) {
   Serial.println("can't initialize card");
  }
  if (!vol.init(card)) {
    Serial.println("can't initialize volume");
  }
  if (!root.openRoot(vol)) {
    Serial.println("can't open directory");
  }

  Serial.println("Files on SD card:");
  root.ls();
}

char filename[] = "ITALO.TXT";

void loop() {
  if (!file.open(root, filename))
  {
     Serial.print("failed to open file");
     Serial.println(filename);
  }
  char letter;

  Serial.print("Now reading file: ");
  Serial.println(filename);
  while (file.read(&letter, 1) == 1) {
   Serial.print(letter);
  }

  while (1) {}
}